Introduction
Stuffed animals often hold sentimental value, and when they get torn or develop holes, it can be disheartening. However, with a little sewing know-how, you can easily repair these holes and extend the life of your beloved plush toys. In this article, we will guide you on How to sew a hole in a stuffed animal ensuring that your furry friend can be cuddled and cherished once again.
To sew a hole in a stuffed animal, assess the damage, clean the area, thread a needle, sew the hole using a running or ladder stitch, secure with a knot, and trim excess thread.
1. Materials Needed
To sew a hole in a stuffed animal, you will need the following “materials“:
- Needle
- Thread
- Scissors
- Pins (optional)
- Stuffing (if needed)
2. Assessing the Damage
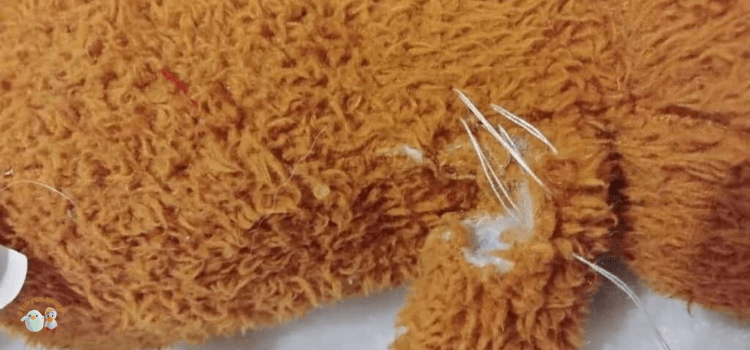
Before you begin the repair process, carefully examine the hole in the stuffed animal. Determine the size and location of the hole and assess the condition of the surrounding fabric. This will help you plan the appropriate repair technique.
3. Preparing the Stuffed Animal
To ensure a smooth sewing process, it’s essential to prepare the stuffed animal. Gently clean the area around the hole using a damp cloth or sponge to remove any dirt or debris. Let it dry completely before proceeding.
4. Choosing the Right Thread and Needle
Select a thread that matches the color of the stuffed animal or opt for a neutral color that blends well. For small holes, a regular sewing thread should suffice. However, for larger tears, consider using a stronger thread like dental floss or upholstery thread. Choose a needle with a size appropriate for the fabric and hole size.
5. Thread the Needle and Knot the Thread
Cut a length of thread long enough to sew the entire hole with some extra length for knotting. Thread one end through the eye of the needle and fold the thread in half. Tie a knot at the other end, ensuring it is secure and won’t slip through the fabric.
6. Starting the Sewing Process
Position the stuffed animal in a way that allows easy access to the hole. Insert the needle from the inside of the stuffed animal, bringing it out near the edge of the hole. Leave a small tail of thread inside the toy.
7. Sewing Techniques
For small holes, you can use a basic running stitch. Push the needle through the fabric near the edge of the hole and then bring it back up, creating evenly spaced stitches. For larger tears, consider using a ladder stitch or whip stitch, which provides stronger and more discreet repairs.
8. Securing the End of the Thread
Once you have sewn across the entire hole, secure the end of the thread by creating a knot. Take a small stitch through the fabric near the last stitch, loop the thread around the needle, and pull it tight. Repeat this process once or twice to ensure a secure knot.
9. Final Touches and Inspection
After sewing the hole, gently tug the fabric around the repaired area to ensure the stitches hold firmly. Trim any excess thread, but be careful not to cut the fabric. Inspect the repair and make any necessary adjustments to improve the appearance and stability.
10. Washing and Caring for the Repaired Stuffed Animal
If the stuffed animal is machine washable, follow the care instructions to clean it. For delicate toys, spot cleaning with mild detergent and a damp cloth is recommended. Avoid submerging the repaired area in water until you are confident in the strength of the stitches.
11. Preventing Future Damage
To prevent future holes or tears, handle your stuffed animals with care. Avoid exposing them to rough play or sharp objects. Regularly inspect the toys for any signs of damage and address them promptly. Consider reinforcing weak spots or applying fabric patches as preventive measures.
Conclusion
Repairing a hole in a stuffed animal is a satisfying and practical skill to possess. By following the step-by-step process outlined in this article, you can revive your cherished plush toys and enjoy their companionship for years to come. Remember to take your time, choose the appropriate materials, and ensure a secure and neat repair.
Frequently Asked Questions:
Can I use a sewing machine to repair a hole in a stuffed animal?
Yes, you can use a sewing machine for larger tears or if you’re comfortable using one. However, hand sewing is generally more precise and allows for better control over the stitching.
Is it possible to repair a heavily damaged stuffed animal?
While it depends on the extent of the damage, some heavily damaged stuffed animals may require professional repair services. Assess the damage and decide if it’s within your capabilities or if seeking professional help is necessary.
What should I do if the stuffing of the toy is coming out of the hole?
If the stuffing is protruding through the hole, gently push it back inside the toy before sewing. Ensure that the hole is securely closed to prevent further stuffing from escaping.
Can I use fabric glue instead of sewing?
Fabric glue can be an alternative for small, temporary repairs. However, sewing provides a more durable and long-lasting solution.
How long does it take to sew a hole in a stuffed animal?
The time required depends on the size of the hole and your sewing skills. Smaller holes can be repaired in a matter of minutes, while larger tears may take longer.

